Saturday, January 31, 2009

A Championship Fight with a Couple of Brackets


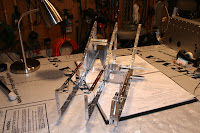
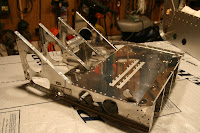
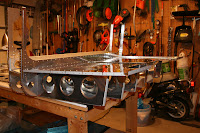
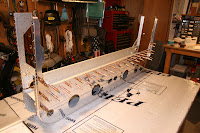
Today started just fine. Riveted the left and right seat assemblies to the center section bulkhead. Put the manufactured head on the seat skin side and then flipped the assembly over with the help of Adam and riveted all of the ribs placing the manufactured head on the bulkhead side. Used the manual squeezer here.

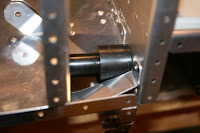
Riveted the bulkhead side assemblies and the bulkhead cap, and installed the bushings and roller. Note here that the roller on the right side of the aircraft is in the opposite direction of the roller on the left side. So far no problems.

Then today's fun began. It was fight time!!!! Started to assemble the control column mount assembly. After carefully deburring all of the parts I set the first rivet surrounding the bearing. The bearing started to bind. Set the second rivet and it got worse. The bearing was tough to turn, but still movable. Decided at this time I'd drill out the rivets, clean up the parts and try again. Getting good at drilling out rivets using a #31 bit, so as not to disturb the original hole. Tried a second time with the same result. Drilled the rivets out again. Now it is clear that the bearing recesses have been milled a bit short. Assembled the parts a third time after doing a bit more deburring. The result is that the bearings are still a bit stiff. Looking forward in the plans, it appears that as long as the bearing will move, albeit them being stiff, it is OK. Will check with Van's builder support. I had to file the shop side of the rivet a bit to get it nearly flush with the surface of the part.

OK, will go forward!!

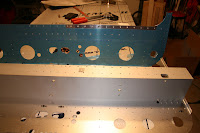
Prepped the bulkhead flange and the Stub Spar Receptacle Support. Then, prepped the F-1203A bulkhead. Countersunk all of the holes. Glad I bought a second microstop. Now wish I had a third. Then, used a Uni-bit to final drill the holes to 7/16" and 3/4". Used a set of dykes to remove the "hatched area" and then used the dremel with a small sanding drum to make the hole nice and round. Happy that tomorrow will be a bit better!! Hope!! But Sunday is SUPERBOWL Sunday. Got the BBQ wings on order. No diet on Sunday!

Finished the day by deburring some of the upcoming parts.

UPDATE: Called Van's and provided them with the following info after drilling out all of the rivets from the control column brackets. The bearing is very free after removing the loads.

Bearing 0.187"
Middle Plate 0.126-0.1265"
Outer Plate #1 0.0635"
Outer Plate Bearing Recess 0.0375" (So Recess Depth - 0.026")
Outer Plate #2 0.0635"
Outer Plate #2 Bearing Recess 0.0375-0.0385" (So Recess Depth - 0.025-0.026")

Total Recess = Recess Depth #1 + Recess Depth #2 + Middle Plate = 0.176 - 0.1765"
The bearing is 0.187" IT IS Getting CRUSHED!

And as mentioned on the VAF forums there may also be some side forces. It was suggested to set the rivets around the bearing just a bit at a time to minimize the side loads.

Van's support indicated that their tooling methods for the COM 3-5 bearings are being improved as they were not accurate enough. My stiff bearings here are not acceptable. Van's will send me new brackets but it might be 1-2 weeks. Will try one more time after priming the parts to gain a mil or two or three, then try again with my parts. Will use the above suggestions.

Time - 7 hours (Includes my Fight with the Bracket)

Friday, January 30, 2009

Completed the Left and Right Seat Rib Assemblies


No problems today. The fuselage is getting bigger. Fabricated and attached the Crotch Strap Brackets attaching the required nutplates. Believe there is a problem here with the plans. Page 21-06 Step 2 tells you to dimple the nutplates for F-1276B, I think it should have been for F-1267A.

Attached the crotch strap brackets and moved on to cutting the hinges for the seat backs. As mentioned in many posts, cut the hinge to 20.5", and, as such it will agree with Figure 4 on Page 21-06. Doing it this way you won't be sorry!! Look at Page 21-06 Figure 4 and Page 21-07 Figure 1. Thanks for to VAF forums and the other blogs.

Continued with the assembly. No real problems. Don't forget the snap bushings.

Almost can see where the pilot and co-pilot sit!!!!!!

Time - 7 hours

Thursday, January 29, 2009

Seat Belt Attach Lugs and Seat Ribs


Attached the seat belt attach lugs to the seat ribs. Then dimpled the ribs for the required nutplates and installed the nutplates. It is helpful here to read ahead and first figure out where you have to dimple each of the parts on this page, then, do all of the dimpling. Same with attaching the nutplates, etc. I think I changed the dies in the squeezer about a hundred times (maybe, an exaggeration!!). Wish I had about 4 yokes!! Then installed the pulley bracket assembly and the flaperon mixer arm between the ribs. Ensure you use the 120 degree countersink on F-1252. No errors today. For now I have learned to read, re-read and then re-read again.

There is also an error in Step 3, Page 21-05. I believe the correct references should be to Page 21-07 and Page 21-08. And I submitted an improvement to Figures 3 & 4. Both of the ribs used here should have the annotation ("with nutplates attached on this flange"). Took me a bit to ensure that I was using the correct ribs.

Time - 5 hours

Wednesday, January 28, 2009

Lots of Progress-Section 21


Riveted the rear wing spar receptacles. As I had previously riveted the nutplates to the baggage ribs and had previously riveted the bearing bracket assemblies it was time to move forward.

Riveted the bulkhead to the baggage ribs, attached the aft ribs, and then dimpled and riveted the nutplates. Look at the figures. The nutplates are different depending on the location. Thanks, JerryG! Avoided a mistake here!

Riveted the Bearing Bracket Brace and and Bearing Bracket assemblies. No problems.

Then, built the pulley brackets and built the Flaperon Mixer Arm Assembly, had the revision to Page 21-04.

Spent the rest of the day deburring the seat belt attach lugs, supports and seat ribs.

Time - 7 hours

Tuesday, January 27, 2009

Installed the Baggage Floor Ribs


Primed the mating edges of the parts that would be required on the next few pages. I had deburred them a few days ago.

Installation of the ribs went fine. I have to confess I had to drill out two LP4-3 rivets. I am glad I caught my mistake before I riveted all of the ribs. READ the plans. The manufactured side of the rivet goes on the bulkhead side!!! Used the hand squeezer for the bulkhead rivets. Needed the wedge to rivet the bulkhead to lower rib rivets.

Be very careful riveting the nutplate rivet closest to the bulkhead. Do not crush the nutplate. A short but good day!

Prepped the wing rear spar receptacle. More on Wed.

Time - 4 hours

Monday, January 26, 2009

Baggage Floors Riveted!!


A fellow Chapter member came over this afternoon and we riveted the baggage skins to the fuselage. Mike, has a beautiful RV-9A, completed close to a year ago. He took a look at the assembly, placed the squeezer over the bulkhead flange and said we could squeeze the rivets as opposed to using the gun, offset set and a bucking bar. It came out very nice. Nice, tight flanges and good rivets.

We used the squeezer with the cupped die. The instructions suggest using two flat sets, but, I tried it on a sample and it flattens the AN470 head. With the bulkhead horizontal, we placed two large spring clamps on either side of the rivet location. To center the squeezer you have to bend the skin downward. When I first tried, I was a bit hesitant to bend it down to gain clearance for the squeezer, because the gap opened. Mike bent the baggage skin down, centered the squeezer on the rivet, then, he pushed on the squeezer horizontally with a bit of force forcing the rivet in the hole and closing the baggage floor flange gap as I pressed on the other side of the bulkhead. Squeezed it and we moved on to the next.

Took us about 30 minutes to set all of them. Gave us a very respectable result. There is no gap between the bulkhead and the baggage floor skin flange.

To squeeze the rivets this way, it most definitely requires two people. Also don't forget to put some painters tape on the skin near the flange. I scratched mine, cause I forgot it. The area will get painted with the interior.

Thanks, Mike!! Meetings tonight at the high school. Adam starts high school next year.

Time - 1 hour

Saturday, January 24, 2009

Started Section 21-Mid Fuselage Ribs & Bottom Skins

Spent the day deburring parts that are required in the first few pages of Section 21. Then contemplated how I was going to rivet the baggage floor to the bulkhead. I think I will rivet the parts using a 2X rivet gun with an offset set and a bucking bar. I just cannot do it and come up with a good result by using the squeezer. Have to enlist an assistant as using the 2X rivet gun will require the use of an offset set, which to me is awkward. A bucker will certainly help me here as I am not an expert riveter. (This is what one of my fellow blogger, JerryG, ended up doing.)

Skipping around a little bit on the first few pages of the section cause I need some experience to help me with the baggage floor riveting.

Deburred all of the ribs, prepared the baggage floors, the baggage bulkhead, and the bearing bracket assembly. Attached the 6 nutplates to the ribs, and fitted the F-1206C rear spar receptacles to fit the ends of the rear spar assemblies of both of the wings. (This gives one an idea on how the wings are going to fit into the fuselage. A plane is in the making). The fit is very good. And then, riveted the bearing bracket assemblies after inserting the COM 3-5 bearing

Time - 5 hours

Friday, January 23, 2009

Completed Section 20-Center Bulkhead


Completed the center section bulkhead and really did not have any problems. The plans are pretty much clear. Drilling, drilling and drilling. Took me about 3 hours to drill and then debur all of the holes. The guide (previous post) ensured my holes were 90 deg to the angle. The plans tell you to match drill 72 holes, I counted 71 holes. We will see as we proceed. Countersunk the holes in the F-1204 center section and then dimpled the holes in F-1204D. When you countersink, follow the dimensions for the required hole width, mine could have been a bit wider. Use a Uni-bit to get a nice 1/4" hole in your sample.

Prepared and attached the skin attach flange and prepared the skin stiffener.

Riveting took a bit of time, but, no real problems. I had to measure the driven head diameter with a micrometer. All passed the Mil-spec but failed using the go/no-go gauge. The next size (length) or half size would be a better choice here.

Attached the side skins and fitted/drilled the skin stiffeners.

Time - 7 hours

Thursday, January 22, 2009

Started the Fuselage Kit - Section 20


Had a nice visit today with a fellow RV-12 builder from Jesup, IA. A few months ago we visited John and his wife Ann, and, today, he inspected my progress.

Started the fuselage after doing a bit of plan reading and looking at the other blogs. During my paper review, was stuck on Step 4, Page 20-03, that is, until I read and understood the entire step. This step tells you to machine countersink the F-1204 center section and THEN dimple the F-1204D center section aft bulkhead at the location of the AN426AD4 rivets. Because I did not read the entire step, I thought the step required me to machine countersink the aft bulkhead. Once I felt comfortable in understanding the section, assembly began.

Attached the four nutplates and the two retainer blocks.

Placed the bottom skin over a sheet of styrofoam taped to the workbench. The foam board allowed me to cleco the bottom flanges of the center section and the aft bulkhead and keep everything flat. The fit is nice and true. Will use the quick clamp as a guide to ensure I am drilling 90 degrees to the surface. Notes in the other blogs indicate this is important.

Lots of match drilling of the aft bulkhead to the center section on Friday. Then I have to deburr the edges of the aft bulkhead and the holes in both pieces.

Time - 2 hours

Tuesday, January 20, 2009

Tailcone is Complete


Completed riveting the tailcone. I am very satisfied with all of the skin overlap joints. The Cleaveland tool did a very good job. As I mentioned, I did not rivet the forward 7" of the J-stiffener. Can always do it later. As such, I am complete with this kit for now. Will complete Section 11, Empennage Attachment (mounting of the vertical and horizontal stab to the tailcone) and Section 12, Empennage Fairings (fiberglass fairing work) later, this will give me more storage options.

The fuselage which in currently in the spare bedroom is next. Will spend a day or so studying the plans and looking at the posts on the VAF forums. Also have to download and print the plans revisions from Van's website. Will take the flashdrive to Staples or Kinko's and have them printed on 11"x17" paper.

Took me 108 hours over the course of 23 working days to get the tailcone to this point, with Section 11 & 12 yet to do to totally complete the tailcone kit.

Time - 2.5 hours Total Empennage - 108 hours Wings (Complete) - 175 hours

Monday, January 19, 2009

Tailcone Almost Complete


Riveted the Right and Left Side skins, and then riveted the Upper Right and Left Skins. Riveting took a bit of time, there are a lot of them. There was another step that said to ONLY rivet the holes in the upper left and right skins that are common to the left and right side skins. Again there was no mention of the rivets in the fuselage frame. I riveted the open holes in the fuselage frames on the lower skins and the side skins.

Prepped and primed the F-12106, forward skin rib after attaching the nutplates.

Then cleaned and deburred the top skin. Used the Cleaveland tool to break the edges. It worked extremely well. Made three passes with the tool on each edge, tightening it ever so slightly between passes. There seemed to be a lot more control of the tool doing it this way. Put a bit more of a break on the aft end of the skins per the plans.

Also found it was best to start to cleco the top skin from the aft end working forward. Ensure you catch all of the tabs on the fuselage frames.

When I clecoed to the F-1210C vertical stabilizer bracket, noticed something amiss. There were seven holes in the skin BUT only five holes in the bracket. I match drilled the skin to the bracket such that it matched Figure 2 (inset) on Page 10-10, removed the skin, deburred the holes, and cleaned the few metal flakes in the tailcone. I also radius'd the sharp tips of the F1210-C bracket as suggested on Figure 2 (inset). There is an obvious missing step here.

Attached the forward skin rib (for the vertical stab) and attached the J-stiffener (beveled end aft). Should finish riveting the tailcone on Tuesday. Also, Step 8 on page 10-10 tells you to rivet the 25 holes in the J-stiffener and makes no mention of leaving the forward 7" open (like all other forward holes). Think I will leave them open for now.

Time - 7 hours

Potential Issue with Tailcone Plans-Page 10-10

Reading ahead, I was confused with the installation of the angle at the top and forward end of the fuselage/tailcone.

First look at Page 10-03, Step 7. F-1283C has a flat end and a beveled end. Now look at Page 10-10, Figure 2 and Detail A-A. I cannot tell if the flat end goes forward and the beveled end goes aft. Detail A-A suggests the flat end goes forward. Figure 2 is not clear.

Would seem to make more sense with the beveled end forward because this would then match the J channel at the forward end of the Upper Left and Right Skins (they are beveled at the forward end). But this does not seem to agree with Detail A-A.

Will send Van's an e-mail.

UPDATE: Per an e-mail from Ken Scott at Vans, he tells me that the beveled edge goes aft and the flat edge goes forward. I will install it that way, and, as such the installation will be in agreement with Detail A-A.

Sunday, January 18, 2009

A Little Progress


Finished the edges and deburred the right and left upper skins. Even though not required I broke the edges of these skins ever so slightly and ended up with a very good fit. Could of used about 50-75 more clecos. This must be one of the times during the build why there are so many of them listed on the suggested tool list. Will have to move them as I rivet. No issues. Also, lots of the NFL today. Should be a good Superbowl with the Cardinals and Steelers.

Time - 2 hours

Saturday, January 17, 2009

Installed the Static System

Not too much work on the project today. Installed the static system. After receiving an answer from the VAF forums and a friend I ended up pulling both of the rivets until they snapped. There was plenty of "meat" inside the fuselage to attach the 1/8" tubing. I tried to just partially pull one of the rivets but it continued to spin in the hole. After snapping both, it was time to punch out the mandrels with a 1/16" punch. One of the mandrels came out with a couple of small taps. The other required a few large raps. Backed up the skin with a piece of wood with a hole in it. Adam assisted here cause it takes 3 hands to do this. Attaching the nylon tubing to the "T" was a bit challenging. After about an hour of trying different unsuccessful methods, here is what I ended up doing. I first put a 1/4" length of 1/8" tubing on the T. Then I put the T in the freezer for about fifteen minutes to harden the 1/8" tubing. Then heated the nylon tubing end a bit by placing it in hot, just boiled water. Shook out the moisture and inserted the nylon tubing over the 1/8" tubing on the T. Worked well for me. Picked up some RTV and RTV'd the 1/8" tubing to static port pop-rivet. Mel on the VAF forums suggested to use "electronic" grade RTV as it is much more friendly to aluminum. Will let it sit overnight to cure. Upper right/left skins and top skin tomorrow, that is, if the NFL becomes boring. Hoping for Arizona and Pitt. That would make a good Superbowl.

UPDATE: Here is a static system rivet hint from Mike Tea, received June 2009. "I drilled a 3/16 inch hole thru a block of wood to fit over the static system rivet on the inside of fuselage. An LP4-3 rivet mandrel is smaller than static air rivet mandrel. Cut one off to about 3/8 inch and started it into static port. Then used a C clamp to press the LP4 mandrel into the static port pushing the mandrel head out. Came out pretty easy. Just takes 3 hands."

Time - 2 hours Total Empennage - 96.5 hours Wings (Complete) - 175 hours

Friday, January 16, 2009

Skin Installation and a Static System Question


Riveted the bottom left and right skins together, riveted the same skins to the fuselage frames. The plans tell you ONLY to rivet the lower right an left skins to the bottom skins. I did it that way, leaving the lower right and left skins NOT riveted to the fuselage frames. After discussion with a fellow builder, the plans must be written this way to allow the frames to flex a bit to allow installation of the F-1211 aft bulkhead assembly. On the other hand, maybe a plans omission. But, it doesn't matter. Can rivet them during side skin riveting.

Installed the aft bulkhead assembly. Deburred, finished, and broke the edges of the left and right side skins. Installed the skins and appear to have a good fit. Ran the pitch/trim wire and the strings thru the fuselage. One end of the pitch/trim wire has pins. It appears that the pin side goes forward as lugs are crimped on the aft end, Page 11-06, Step 13.

Started reading the instructions for installation of the static air system and then had to do a bit of research. Was worried there might not be enough meat inside to connect the 1/8" tubing after setting the static air system rivets.

The one page of instructions that comes with the static air kit tells you to set the rivets into the fuselage side skin and after setting the rivet the mandrel is driven out.

A post from Scott on the VAF forums in November 08 indicates.....

"I believe the instructions say to slightly set the rivet, but not enough to break the mandrel. Tap out the mandrel to leave a hollow rivet. Push the static hose over the rivet end and seal it in place with a smear of proseal or RTV around the perimeter. I could be wrong...but thats how I have done it about a dozen times and have never had a leak (in that location anyway )."

Placed a post on the VAF forums asking for the best way to do this?

Time - 5 hours