Monday, April 13, 2009

Canopy/Fiberglass Pictures


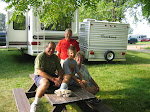
Observed John Bender doing some fiberglass work on the canopy sides. Pictures are worth a thousand words. Observing the process is even better. Thanks, John

Thursday, April 9, 2009

Canopy Research

Essentially took the last couple of days off because I have been waiting for parts from Van's. I have done a bit of research on working with the plexiglass canopy. It IS most likely the MOST expensive part of the airframe. Here is what I have learned to date (and, I will most likely add items to this listing as I learn more.)

Only thing I did yesterday on airframe parts was to clear coat the tunnel covers and seatbacks. Also, YESTERDAY, received the upholstery and seatbelts from Flightline Interiors. Looks real nice!

Item #1 - Heat the work area to 80-90 degrees. The canopy will be much more forgiving if its ambient temperature is high. May be uncomfortable for you, but, the canopy loves it.

Item #2 - Put a ceramic space heater in the fuselage to further help warming the plastic. Use a thermostat on the heater to maintain the fuselage temperature at 90 degrees. Thermostats are available from Sears and others for the bullet type heaters. Got mine from Sears. Do NOT get the temperature too high to warp the bubble.

Item #3 - NEVER, and I repeat NEVER enlarge a hole in the plexiglass using a normal drill bit or a plexi drill bit. If you do it with a plexi or normal drill bit the plexiglass will get sucked up the bit as it penetrates and then the plexiglass will snap down. A good scenario to create a NICE crack. A SINGLE fluted UNIBIT is preferred. Go very slow with the UNIBIT in a battery power hand drill with little pressure. (As added insurance the drill clutch can be set on its lowest setting). The craftsmen (multiple RV offenders) have told me during an EAA Chapter 75 meeting to drill dry (a lubricant is not required). (The RV-12 plans tell you to enlarge the #40 holes with a #27 plexi bit....Not a good idea!!!)

The craftsmen at the EAA meeting also indicated that another way to drill the canopy is using a hand drill such as this:

Click here for an example of a Hand Drill


With the Unibit in the hand drill they tell me that you have very good control. You can feel when the bit is just about to break thru and back up a bit. Then you can complete the hole from the same or opposite side. The Unibit can then be used to camfer the hole from both sides.

Item #4 - Ensure there is enough play between the screw outer diameter and the inner diameter of the screw hole that you drill in the plexiglass canopy to account for expansion and contraction of the plexiglass.

Some additional information on expansion and contraction.

From the VAF forums:
If the holes drilled in the canopy are for flat head screws then the holes in the canopy are for clearance only. When the screws are thightened down the conical taper on the screw engages the conical shape of the countersunk hole. The interface will center the screw in the hole. Therefore the hole through the canopy plexi is purely for clearance. A number 27 drill is 0.144" diameter, a #6 screw is .138" diameter. That is only .006" clearance. Not very much if you ask me. There is nothing wrong with using a #21 (.159" 5/32" diameter) drill for the clearance holes in the canopy plexiglas.

From http://www.ceebaileys.com/install.htm:
Drilling windshields
Whenever screws or bolts are used through holes drilled in the Plexiglass as for the securing of an aircraft windshield or window, consideration should be given to the expansion or contraction of the Plexiglass as effected by changes in temperature. Plexiglass expands or contracts with temperature at the rate of 1/16 inch per foot per 100 degrees F. temperature change. For example a line of holes at the top of the windshield 36 inches across using a 1/8 diameter. screw would require that the holes be 5/16 inch in diameter to take care of a temperature spread of 100 degree F. When holes are drilled with insufficient clearance excessive strain is placed on the windshield and may cause the holes to crack out at high or low temperatures. Excessive strain on Plexiglass windshields shortens their service life and invite cracking and crazing.

I am going to have to ask engineering at Van's and see if a larger hole (5/32") is acceptable.

Item #5 - Follow the plans precisely when drilling and clecoing the holes thru the plexiglass. You do not want to stress the plexiglass in one direction or the other.

Item #6 - Think this is a good suggestion, based on my research. After final drilling all of the holes in the plexiglass, VERY VERY LIGHTLY touch the holes on both sides thru the plexiglass with a permagrit countersink bit with the correct pilot (available from Avery). Will eliminate any stress risers or microcracks where the bit entered or exited. The craftsmen at the EAA meeting also indicated that the Unibit shoulder or a hand deburring bit will also work here. When using the Unibit to smooth or camfer the edge of the hole, use the hand drill.

The craftsmen at the EAA meeting have also indicated that it is a good idea to place a thin plastic washer between the metal canopy frame and the plexiglass. This is NOT in the RV-12 plans. I am going to have to ask engineering at Van's and see if this is acceptable.

Item #7 - When drilling thru plexiglass always back it up with a wood block and also place pressure on the plexiglass where the bit enters so the plexiglass is not sucked up with the bit as the bit penetrates.

Item #8 - Set any pulled rivets thru plexiglass using a hand puller and NOT a pneumatic one.

PLEASE e-mail me with any other suggestions! marty.santic at gmail.com

Time Yesterday - 2 hours (Clearcoating)

Tuesday, April 7, 2009

Interior Painting Continues

Applied the stone finish to the covers and seatbacks. Clear coat will be appied after the stone finish cures. Need the backordered and shorted parts from Van's to finish the electrical section.

Time Today - 4 hours

Monday, April 6, 2009

Electrical and Interior Painting

This morning I ensured both of the harnesses were as far forward as possible. Read a post on the VAF forums that indicated the harnesses will not run up and against the firewall if not done. Also, found a couple of needed but backordered female spade terminals in my tailcone kit. Added a ground wire to the 12VDC connector.

Then prepped all of the tunnel covers, the large tailcone cover and the seatbacks for primer. Primed them. Primed and final painted the flap handle with the powdercoat color that I have previously used in the interior.

Will spray the stone finish on the tunnel covers and the tailcone cover on Tuesday and then clear coat them the following day. That will leave the step area. Have to place the non-skid pads first and then mask, prime, paint/clearcoat. Then the majority of the interior paint will be complete.

Time Today - 5 hours

Sunday, April 5, 2009

Took a Break!

It is Palm Sunday!! Did absolutely nothing on the project today. Watched TV and then unpacked all of my fiberglass supplies from Wicks that I received on Friday. Baseball opens today. Go CUBS!

Saturday, April 4, 2009

Wiring Continues


Installed the 12VDC connector and the music harness. John Bender passed me this tip. Do not tighten the 2 ground connections near the 12VDC connector. The bolt/nut will be used for flight control installation a little later. Then started to look at the microphone and headset harness for the pilot and co-pilot.

The plans say the co-pilot harness is 1" longer than the pilot harness. I measured mine and the labeling on the cables was in accordance with this. (Page 31-10, Step 4). Yet my pilot harness has a couple of 3" wires that were most likely intended for the 1/8" jack to record audio. The plans say this should be on the co-pilot side. (I will not install the 1/8" jack and if the need ever arises, I will build an adapter w/ the 47K resistors.) So I am going to cut off the 3" wires on the pilot harness.

Also, cannot find the microphone jack stepped washer and the headphone jack ISOLATOR washer per Figure 1 on Page 31-10. They were not attached to the jacks that were supplied to me. Found out that they are backordered. As such, I left the installation of the mic/headphone jacks till later.

With regard to the stick PTT wiring, I performed Steps 2-5 on Page 32-05 before I installed the PTT switches, the associated wiring and sticks per Section 31. Hope the sticks are in there for good. This is most likely a good idea.

Read this post on a suggestion for boring the control stick.

I used Jim Cone's method to get a string thru the control sticks. A small piece of cotton on the end of heavy duty thread, and, then sucked it thru with the shop vacuum cleaner. Took a couple of tries. The bends are torture. Attached a piece of coated twine and pulled the twine via the thread. Then pulled the wires thru.

I have an awful lot of cable above the panel at this time. Hope there will be enough once I try to re-install the pedals. The plans tell us we may have to form the clamps below the firewall shelf into an oval shape. Have not tried it yet, but it will come here shortly.

Attached the female pins to the EFIS update cable wires and completed the DB-9 connector. The crimper from SteinAir worked very well. When attaching the DB pins, ensure the insulation is right next to the pin before crimping. You will get a much stronger connection.

Finished the day by priming and final painting the ELT attach bracket.

WITH the control sticks installed, I really want to HOP IN! A little more wiring and then have to wait for the back-ordered parts from Van's to finish the rest. Because I have been jumping around, will have to re-read and confirm all of the steps in the wiring section. From Step 1.

Time Today - 5 hours

Friday, April 3, 2009

More Wiring


Continued with the wiring. Installed the WH-RV12_Optional harness. Looking the harness near the MAIN DB-25 connector there were two wires, an orange and a white-black that were not connected to the MAIN DB-25 connector and did not have female pins installed. Per a Jim Cone post, I installed female pins on the two wires. Was told that they are for future expansion. As I am considering the autopilot option, I continued. Found that there were two wires already connected to pins 9 & 12 of the MAIN DB-25. A black wire was in pin 12. A white wire was in pin 9. I removed both of the pins, with the tool, as the long wires from the autopilot disconnect switch will be inserted into these pin locations on the MAIN DB-25 on the OPT harness.

Ran the wiring to the left and right wing. Then ran the wiring for the OAT probe.

Running out of some of the parts. Need more of he female connectors! Some are on backorder and some were shorted. Van's is aware of both and should be receiving them soon.

Looking into the future, I do not want to run the trim wires or the static line forward until I install the 7 wire autopilot wire which is on backorder. Such will allow me to crimp all of the difficult connectors on both sides of the 7 wire harness on the bench before I install it. The male and female spade connectors are a bear to squeeze.

Time Today - 4 hours