Monday, September 29, 2008

Rivets ??


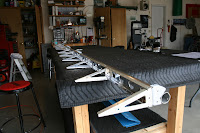
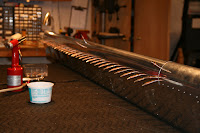
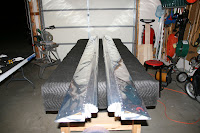
So if there were 10,000 rivets in the box that Van's sent me, how many have I used during construction of the wing kit? Looking at the pictures, the rivets filled 3 of the Tupperware containers. I've used 55% of the rivets. 5500 rivets, so far. The pneumatic riveter from Avery has worked well!!

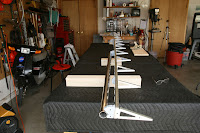
Finished the Wing Kit Today - Finished the Right Flaperon


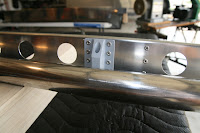
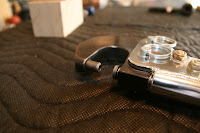
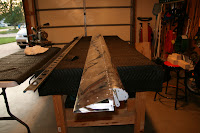
Finished the wing kit, it has been 1 month exactly!!!!! I finished the right flaperon, and, as such, have completed the RV-12 wing kit. All went very well with no complaints. The biggest problem I had today was removing the blue plastic from the inboard nose skin. It took about 60 minutes to remove it, came off in about 100 pieces. Will attach the rod end bearings when I figure out where we are going to store the flaperons. Maybe one of the girl's old bedrooms! Do not have any more to add to the blog with regard to suggestions.

Want the next kit, the fuselage kit, ASAP.

This has, so far, been a good experience.

Time - 8 hours Total - 175 hours

Sunday, September 28, 2008

Finished the (1st) Left Flaperon Today


Was a bit concerned yesterday in setting the rivets on the A-1207-L actuation bracket. What worked well what was on the suggested tool list. I used the 1/8" rivet x 1/2" tall cupped squeezer and was able to set the rivets, even though they were quite close to the web of the bracket. Suggest to all to ensure the bracket is as close as possible the inboard nose rib and bracket assembly by inserting the AN3 bolt (not supplied) and using a nut on the other end to squeeze the 8 washers. (My suggestion, not Van's). Then match drill per the instructions, after, of course, ensuring the brackets are 90 degrees to the spar. Attached the pivot bearing brackets and continued with assembly.

The remainder of the flaperon went without a bit of a problem. Follow the instructions and the instructions as shown in the FIGURES. Had to touch drill one on the holes in the counterbalance but otherwise all of the holes in the skins lined up just perfectly.

To form the trailing edge skins of the flaperon, I bent them ever so slowly using a piece of 8" x 24" plywood with a short nap towel between the piece of plywood and the skin. If you go slowly, and use this method, you will get a nice bend to match the A-1205 main ribs and you will not end up with your handprints in the skin. Suggest starting with the bottom edge of the skin up. Go Slow! Do not press on the left or right edge of the plywood, do not put a crease in the skins. Go slow!.

Attached and riveted all of the trailing edge skins. Ensure you are hitting the ribs by feeling with your finger or using a flashlight. Then attached the nose skins. Follow the instructions when match drilling the A1210-L and R nose ribs. Ensure they are 90 deg to the spar, match drill with a #40 drill, insert a 3/32" cleco as you go and then match drill with a #30 drill inserting 1/8" cleco's as you go.

First flaperon is now complete. Looking down the edge, it is absolutely straight with no hint of twist. One more day (hope to finish the 2nd flaperon) and I am out of work! Where is the next kit?

Time - 7 hours

Saturday, September 27, 2008

Started Flaperon Assembly


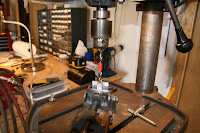
Started the flaperon assembly today. I first drilled the inboard and outboard holes in the counterbalance tube after clecoing the parts and skin together. I drilled the holes in the tube using the suggestion of Jerry Greenberg. He drilled a dimple in the tube using the hand drill and then finished the hole in the drill press. This worked very well for all of the holes in the counterbalance tube. Then riveted the nose ribs to the counterbalance tube. Cleco-ed all of the parts together and then used the hand drill to dimple all of the holes in the counterbalance tube. Disassembled all and finished all of the holes in the tube using the drill press. Match drilled the nose ribs and have to confess that I elongated one of the holes in the skin here. Not bad but another lesson to be learned. When match drilling thru a skin into a harder material, ensure that the drill is vertical so it does not have a tendency to slip one way or another. Disassembled all and deburred all of the holes. Tried my best to debur the interior holes in the stainless steel tube using a round file taped to the end of a long dowel. Riveted the A-1208 bracket to the A-1210-L Inbd nose rib which I had separated earlier. Then attached and match drilled the pivot brackets and the actuation bracket to the spar. Removed all and deburred all holes.

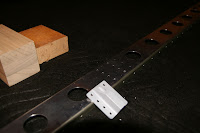
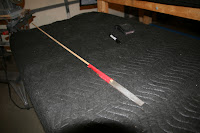
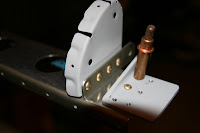
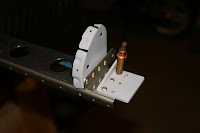
Have a suggestion for Ken Krueger and the engineering folks at Van's. The outboard holes in the A-1207-L actuation bracket are a bit to close to the web of the bracket. I have not set the rivets yet but setting these rivets will be a bit difficult. Will be hard to get the manufactured head of the rivet to sit flush with the surface of the bracket due to interference of the bracket web. The last 4 photos show my actuation bracket (2 photos) and a photo from Jim Cone's website and Jerry Greenberg's website. All show the exact same condition. Will try to be careful when setting the rivets.

Time - 5 hours Total - 160 hours

Friday, September 26, 2008

Ready for Flaperon Assembly


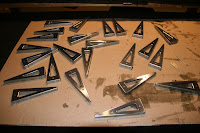
Machined the last flaperon actuation bracket today. Have to say the 2nd actuation bracket looks a bit better than the first. This took about 3 hours. Then I cut the "dreaded" 30 angle in the pivot bearing brackets. Using the VAF forum suggestion, it was easy. Then scotchbrited the parts and cleaned the parts with acetone. Primed the non-alclad components with rattle can Marhyde, available from the local auto parts store (O'Reily). I primed all of the flanges with the Sherwin Williams wash primer. An update... A word of CAUTION, when fluting the flanges of the brackets, flute them exactly where the drawings say to flute. When you match drill thru the flaperon nose skins, the flutes will be extremely close to the match drilled rivet holes. Don't ask me how I know!!

Time - 6 hours

Thursday, September 25, 2008

Continuing with the Flaperon


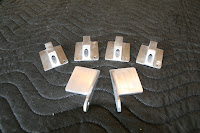
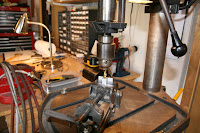
Built the remaining 3 pivot bearing brackets from the supplied material. Took the suggestion of Jim Cone and used a slightly undersized drill to align the bracket in the drill press. Then bored the hole to a 1 inch depth using the correct drill size prior to tapping the hole in the bracket. Then I chucked the tap in the drill press and rotated the chuck by hand, applying a bit of downward pressure. This cut the first 4-5 threads. This ensured the tapped hole was 90 degrees to the material. Continued tapping the hole using the tap handle after removing the vise from the drill press. Building the 3 pivot bearing brackets took me about 3 hours. Still have to make the 30 degree cut in the four brackets. Steve Wyman on the VAF forum suggested that I do the following to make this cut...

"What I did Marty, was to go ahead and do the match drilling on the mounting holes for the part, and then screw the part on it's edge to a square block of hardwood. I then marked off the line I wanted to cut and used the bandsaw to remove most of the material. I then pushed it up against my 12" sanding disc and finished it to the final surface. Only then, did I remove it from the wood block."

Will use his suggestion.

Spent the remainder of the day doing the usual. Removing all of the machine marks and rounding all edges from the remainder of the flaperon ribs, spars and brackets. Renee and Adam Helped me run the spars thru the scotchbrite wheel. Still have to debur the flaperon skins. One more bracket and then ready for flaperon assembly.

Time - 3 hours for the brackets, 4 hours deburring Total - 7 hours

Wednesday, September 24, 2008

Starting the Flaperon Brackets

Took a day off then started the flaperon brackets by building one of the actuation brackets and one of the bearing pivot brackets from the supplied angle and AEX tiedown material. Still have to cut the 30 degree angle in the bearing pivot bracket. Honing my machining skills.

Time - 3 hours

Monday, September 22, 2008

Wings are Complete - Left Wing Completed & Found Loose Part


Completed the left wing by attaching the bottom wingtip panel and then the aft bottom panel. The bottom wingtip panel with its compound curve fit perfectly. Two wings are now in the cradle!! A short break and on to the assembly of the flaperons.

When we flipped the wing over yesterday, I heard something rattling in the wing. It sounded like a rivet or a rivet mandrel. This morning I looked and found what appears to be a portion of the shop end of one of the pop rivets. Found it in the far outboard bay next to the wingtip. Any ideas?? e-mail: marty.santic@gmail.com

Time - 2 hours Total - 139 hours

Sunday, September 21, 2008

Happy Birthday Mom!!!!!!!!!

Today is my Mom's birthday. She lives here in town and is 87!!!!. Yesterday we went out and had a fabulous dinner after church on Saturday. Wanted to celebrate with all!!

Completed the Right Wing and Started the Wingtip on the Left Wing


Today I completed the right wing. Bent the angles as specified in the instructions for the bottom wing tip panel and then installed it. It fit perfectly. How someone could engineer the compound curve in this piece and then have it fit as it does is something short of amazing. As you bend, the angles specified should be close and you will end up with a good fit with all holes aligning. Completed the right wing tip closeout by attaching the trailing edge piece. Match drilled the 6 holes after ensuring the edges were parallel. Then started closeout of the left wingtip. Attached the upper wingtip panels and then attached the aft tip rib and then the forward tip rib. Fluting of the forward tip rib took a bit less time. See the picture of the tip rib showing how I fluted it this time. Two flutes between the holes at the most forward location seemed to work best. Had two helpers today to flip the wing, Tom and Don assisted me as Renee is still in Seattle (spending money!!!!). Comes home on Monday. Seattle to Minneapolis and then a short flight to Moline. Should complete the left wing on Monday.

Time - 7 hours Total - 137 hours
Saturday, September 20, 2008

If You Are Following this Blog.....

Hey, if you are reading this blog, send me a bit of feedback. Would like to know if I am including enough detail, too much detail, enough pictures, etc. Send me a short e-mail and let me know how I can improve it. e-mail is marty.santic@gmail.com

Started Right Wing Tip Closeout


Spent the majority of today prepping the skins and all other components required to close the left and right wingtips. This included removing all machine marks, sanding and deburring all edges, and then priming all of the flanges. I am priming all of the mating surfaces. This took the majority of the day's time but had time to begin right wingtip closeout. Bent the handhold per the instructions and attached it to the main spar. Then attached the rib tip to the rear spar. The wing tip aft skin followed. Then the forward skin. The bottom surface of the rear spar assembly was trimmed to allow the installation of the aft wing tip rib. I used a scotchbrite wheel in the die grinder and removed a bit of the bottom surface of the rear spar at the location of the tip rib. This allowed the tip rib to slide on the rear spar without any interference. Then started to flute the forward wing tip rib. It takes, what I would call some severe flutes to get it to align correctly. Takes a bit fluting, fitting, more fluting, fitting, etc. Think I attached and removed the forward wing tip rib about 20-30 times. Completed the day's work by building the bending tool that will be used on the W-1204D-R wing tip closeout.

Time - 7 hours Total - 130 hours

Friday, September 19, 2008

Dry Fit of the Right Wingtip Components


Located the parts for the right wingtip installation. Started with the right wing because it was already sitting on the table. Took a few photos. From the photos one can see how much the W-1204E-R Fwd Wing Tip rib has to be fluted to match the far outboard top skin edge. From the photos one can also see how the tip of the rear spar assembly has to be trimmed at the far outboard end to allow the installation of the the W-1204F-R Aft Wing Tip rib. It appears as though the Fwd Wing Tip rib will have to be primed (does not appear to be Alclad??) Edge cleaning and priming of the flanges of all wingtip parts will start tomorrow.

Time - 1 hour Total - 123 hours

Completed the Right Wing


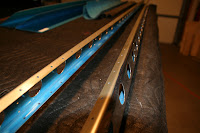
Installed the right wing walk doubler and then riveted the doubler and inboard right wing skin. Attached the doubler per the instructions. This again worked fine without the need for straps, etc. Then riveted the outboard and finally the mid-wing skin. Before attaching the doubler, I used the edge rolling tool on the edge of the doubler that contacts the bottom of the right wing. A photo of the doubler fit and edge rolling tool is attached. This gave me a reasonable fit.

Time - 3 hours Total - 122 hours